반응형
Notice
Recent Posts
Recent Comments
Link
| 일 | 월 | 화 | 수 | 목 | 금 | 토 |
|---|---|---|---|---|---|---|
| 1 | 2 | 3 | 4 | 5 | 6 | 7 |
| 8 | 9 | 10 | 11 | 12 | 13 | 14 |
| 15 | 16 | 17 | 18 | 19 | 20 | 21 |
| 22 | 23 | 24 | 25 | 26 | 27 | 28 |
Tags
- Oracle
- 오라클
- 프레임워크
- CSS
- 자바프로그래밍
- sql
- 프로그레시브웹앱
- JavaScript 내장객체
- TodayILearned
- TIL
- 스프링
- progressive web app
- HTML
- javaprogramming
- 생활코딩
- 메이븐
- tdd
- web
- SpringMVC
- 자바스크립트
- maven
- javascript
- 서브쿼리
- sqldeveloper
- springaop
- mybatis
- framework
- PWA
- js
- 국비지원
Archives
- Today
- Total
1cm
자바 프로그래밍_Day_112_게시글 작성 본문
반응형

2022. 01. 25
home에서 list로 이동할 수 있는 링크 생성
<p>
	<a href="${ path }/board/list">
		게시글 조회
	</a>
</p>
- 게시글 작성
write.jsp 생성
<%@ page language="java" contentType="text/html; charset=UTF-8"
    pageEncoding="UTF-8"%>
<%@ taglib uri="http://java.sun.com/jsp/jstl/core" prefix="c" %>
<%@ taglib uri="http://java.sun.com/jsp/jstl/fmt" prefix="fmt" %>
<%@ taglib uri="http://java.sun.com/jsp/jstl/functions" prefix="fn" %>

<c:set var="path" value="${ pageContext.request.contextPath }"/>

<!DOCTYPE html>
<html>
<head>
<meta charset="UTF-8">
<title>Insert title here</title>
</head>
<body>
<h2>게시판 작성</h2>
<form action="${ pageContext.request.contextPath }/board/write" method="post"
		enctype="multipart/form-data">
	<table id='tbl-board'>
		<tr>
			<th>제목</th>
			<td><input type="text" name="title" id="title"></td>
		</tr>
		<tr>
			<th>작성자</th>
			<td><input type="text" name="writerId" value="${ loginMember.id }" readonly></td>
		</tr>
		<tr>
			<th>첨부파일1</th>
			<td><input type="file" name="upfile"></td>
		</tr>
		<!--
		<tr>
			<th>첨부파일2</th>
			<td><input type="file" name="upfile"></td>
		</tr>
		-->
		<tr>
			<th>내용</th>
			<td><textarea name="content" cols="50" rows="15" ></textarea></td>
		</tr>
		<tr>
			<th colspan="2">
				<input type="submit" value="등록">
				<input type="reset" value="취소">
			</th>
		</tr>
	</table>
</form>
</body>
</html>
page를 불러올 수 있게 mapping 작업 해주기
@GetMapping("/board/write")
public String write() {

    return "/board/write";
}
BoardController 메소드에 @RequestMapping을 붙여주면
@Slf4j
@Controller
@RequestMapping("/board")
public class BoardController {
컨트롤러에서 실행되는 모든 매핑 정보 앞에 /board가 붙는다고 보면 된다.
<mapping path="/board/write"/>인터셉터로 로그인 멤버만 접근이 가능할 수 있도록 처리
@PostMapping("/write")
public ModelAndView write(ModelAndView model, @ModelAttribute Board board) {

    log.info(board.toString());

    model.setViewName("/board/write");

    return model;
}


> pom.xml
<!-- 파일 업로드 관련 라이브러리 -->
<dependency>
    <groupId>commons-fileupload</groupId>
    <artifactId>commons-fileupload</artifactId>
    <version>1.4</version>
</dependency>

<dependency>
    <groupId>commons-io</groupId>
    <artifactId>commons-io</artifactId>
    <version>2.11.0</version>
</dependency>
파일 업로드 관련된 라이브러리 추가
사용해주기 위해서는 multipart-resolver를 등록해줘야 함(빈으로 등록)

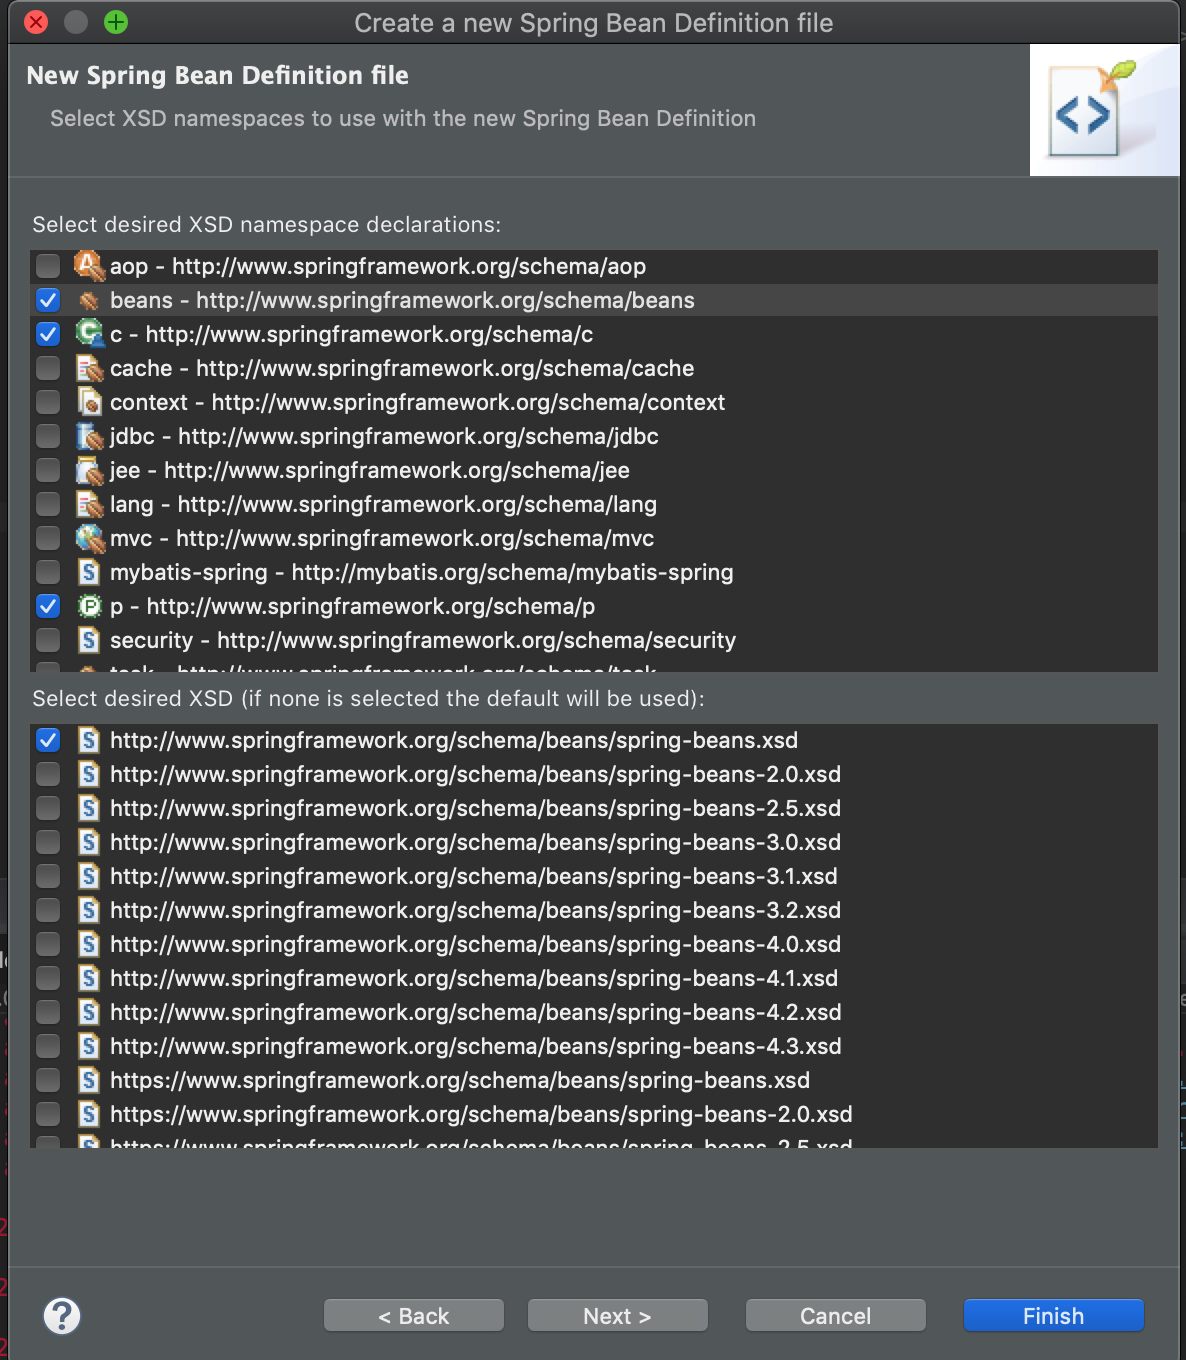
-> multipart-context.xml 생성
> multipart-context.xml
<?xml version="1.0" encoding="UTF-8"?>
<beans xmlns="http://www.springframework.org/schema/beans"
	xmlns:xsi="http://www.w3.org/2001/XMLSchema-instance"
	xmlns:c="http://www.springframework.org/schema/c"
	xmlns:p="http://www.springframework.org/schema/p"
	xsi:schemaLocation="http://www.springframework.org/schema/beans http://www.springframework.org/schema/beans/spring-beans.xsd">

	<!--
		파일 업로드 시 사용할 MultipartResolver 등록
			p:maxUploadSize : 최대 업로드 파일 크기를 지정(10MB)
	-->
	<bean id="multipartResolver" class="org.springframework.web.multipart.commons.CommonsMultipartResolver"
		p:maxUploadSize="10485760"
	/>

</beans>
> root-context.xml에 multipart-context.xml를 import 시켜준다
<import resource="multipart-context.xml"/>
> BoardController.java
@PostMapping("/write")
public ModelAndView write(ModelAndView model,
@ModelAttribute Board board, @RequestParam("upfile") MultipartFile upfile) {

log.info(board.toString());
// 파일을 업로드하지 않으면 "", 파일을 업로드하면 "파일명"
log.info("Upfile Name : {}", upfile.getOriginalFilename());
// 파일을 업로드하지 않으면 true, 파일을 업로드하면 false
log.info("Upfile is Empty : {}", upfile.isEmpty());

model.setViewName("board/writer");

return model;
}
-> 파일 업로드 확인 후 파일 저장 / 작성한 게시글 데이터를 데이터 베이스에 저장
1. 파일을 업로드 했는지 확인 후 파일을 저장
@PostMapping("/write")
public ModelAndView write(ModelAndView model, HttpServletRequest request,
        @SessionAttribute(name = "loginMember") Member loginMember,
        @ModelAttribute Board board, @RequestParam("upfile") MultipartFile upfile) {
    int result = 0;

    log.info(board.toString());
    // 파일을 업로드하지 않으면 "", 파일을 업로드하면 "파일명"
    log.info("Upfile Name : {}", upfile.getOriginalFilename());
    // 파일을 업로드하지 않으면 true, 파일을 업로드하면 false
    log.info("Upfile is Empty : {}", upfile.isEmpty());

    // 1. 파일을 업로드 했는지 확인 후 파일을 저장
    if(upfile != null && !upfile.isEmpty()) {
        // 실제 파일을 저장하는 로직 작성
        String renamedFileName = null;
        String location = request.getSession().getServletContext().getRealPath("resources/upload/board");

        renamedFileName = FileProcess.save(upfile, location);

        if(renamedFileName != null) {
            board.setOriginalFileName(upfile.getOriginalFilename());
            board.setRenamedFileName(renamedFileName);
        }
    }

    model.setViewName("common/msg");

    return model;
}
* 첨부파일 여러개일 경우 배열 형태로 받기(MultipartFile[] upfile)
-> util 폴더 내에 FileProcess.java 생성
package com.kh.mvc.common.util;

import org.springframework.web.multipart.MultipartFile;

import lombok.extern.slf4j.Slf4j;

@Slf4j
public class FileProcess {

	public static String save(MultipartFile upfile, String location) {
		log.info("Upfile Name : {}", originalFileName);
		log.info("location : {}", location);

		return "";
	}
}
@Slf4j
public class FileProcess {

	public static String save(MultipartFile upfile, String location) {
		String renamedFileName = null;
		String originalFileName = upfile.getOriginalFilename();

		log.info("Upfile Name : {}", originalFileName);
		log.info("location : {}", location);

		// location이 실제로 존재하지 않으면 폴더를 생성하는 로직
		File folder = new File(location);

		if(!folder.exists()) {
			// 존재하지 않으면 경로에 폴더 생성
			folder.mkdirs();
		}

		// 사용자가 올린 파일을 새로운 파일 명으로 rename해서 새로 생성
		renamedFileName =
				LocalDateTime.now().format(DateTimeFormatter.ofPattern("yyyyMMdd_HHmmssSSS")) +
				originalFileName.substring(originalFileName.lastIndexOf("."));

		// 파일 저장
		try {
			// 업로드한 파일 데이터를 지정한 파일에 저장한다.
			upfile.transferTo(new File(location + "/" + renamedFileName));

		} catch (IllegalStateException | IOException e) {
			log.error("파일 전송 에러");
			e.printStackTrace();
		}

		return renamedFileName;
	}

}
-> board service를 통해 board객체 저장하기
// 2. 작성한 게시글 데이터를 데이터 베이스에 저장
board.setWriterNo(loginMember.getNo());
result = service.save(board);

if(result > 0) {
    model.addObject("msg", "게시글이 정상적으로 등록되었습니다.");
    model.addObject("location", "/board/list");
} else {
    model.addObject("msg", "게시글 등록을 실패하였습니다.");
    model.addObject("location", "/board/write");
}

model.setViewName("common/msg");

return model;
}
-> BoardServiceImpl, BoardService에 객체 추가 시켜주기


- update 쪽 로직 구현 (BoardServiceImpl)
@Override
@Transactional
public int save(Board board) {
    int result = 0;

    if(board.getNo() != 0) {
        // upodate
    } else {
        // insert
        result = mapper.insertBoard(board);
    }

    return result;
}
반응형
'국비지원_Java > Java Programming_2' 카테고리의 다른 글
| 자바 프로그래밍_Day_111_게시글 목록 조회 (0) | 2022.02.22 |
|---|---|
| 자바 프로그래밍_Day_110_회원 정보 수정, 회원 탈퇴 (0) | 2022.02.22 |
| 자바 프로그래밍_Day_109_회원정보 관련 (0) | 2022.02.18 |
| 자바 프로그래밍_Day_108_로그인, 로그아웃, 회원가입 구현 (0) | 2022.02.18 |
| 자바 프로그래밍_Day_107_Spring MVC, mybatis 연동 (0) | 2022.02.15 |
Comments


